The Best Healthy Recipe for Granola (Gluten-Free!)
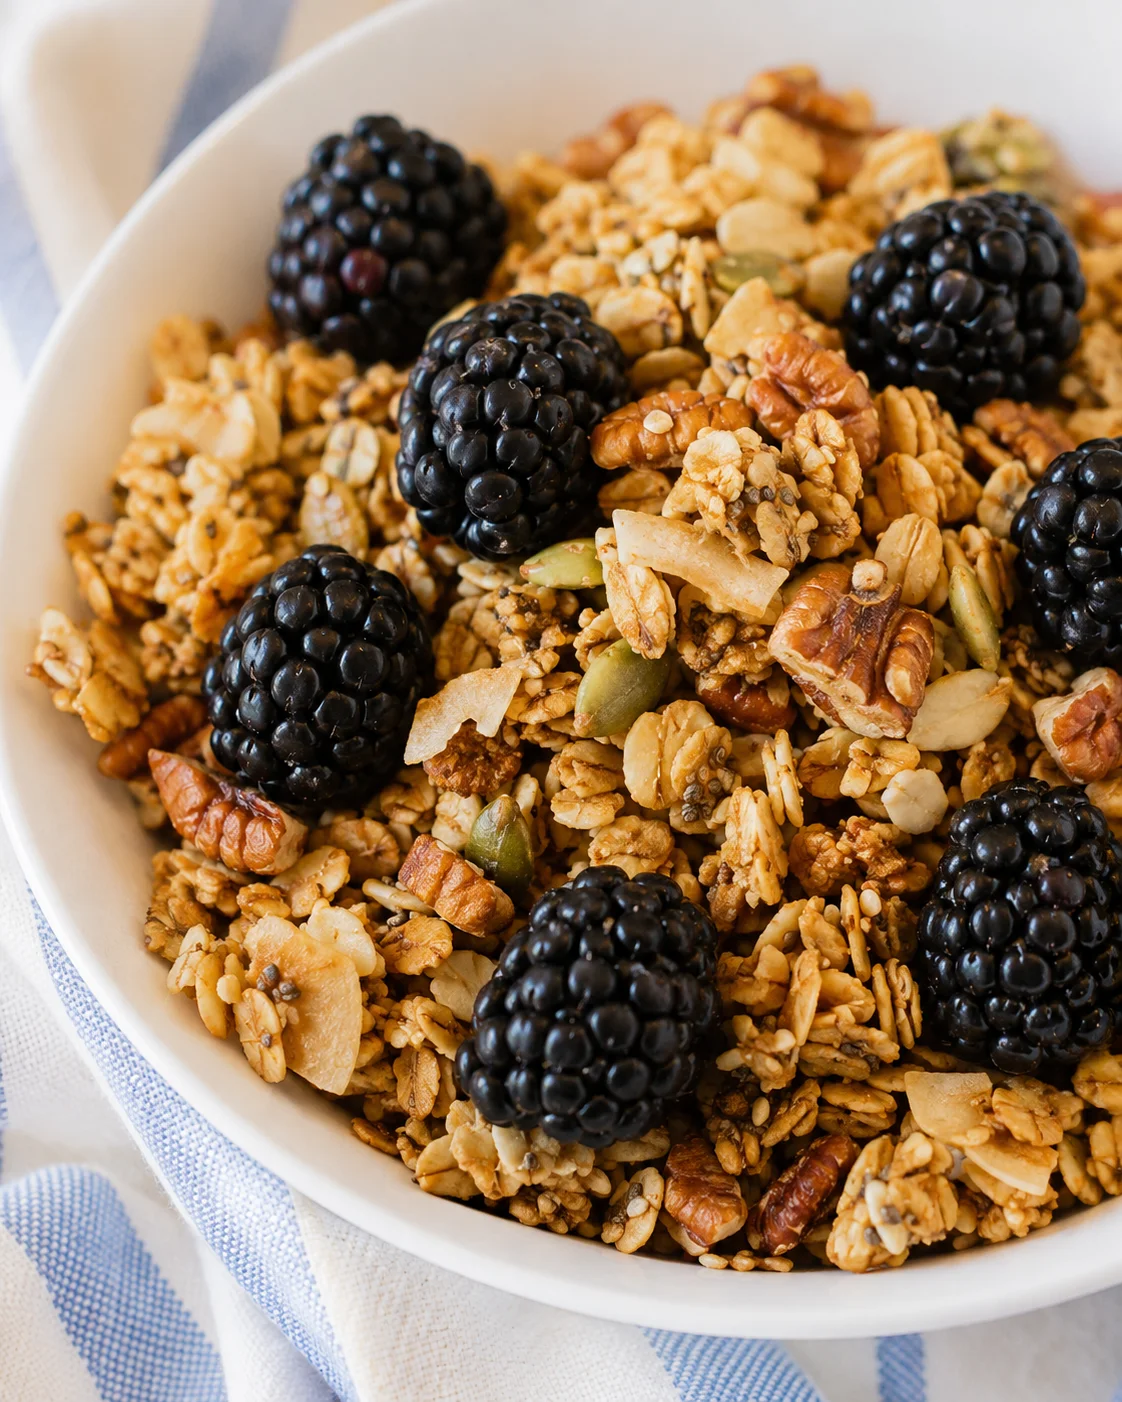
This healthy granola recipe is a total game-changer in our kitchen. Whether it’s alongside a splash of milk with fresh berries, spooned over yogurt, or piled atop a smoothie bowl, it never disappoints. It’s simple, fuss-free, and way better than anything you’ll grab at the store.
One of my go-to breakfasts or afternoon snacks is a cozy bowl of this granola with fresh berries and almond milk, or layered into a quick yogurt parfait. It always hits the spot. Plus, when paired with Greek yogurt, it’s a nice protein boost that keeps me going.
This healthy granola recipe also works well if you’re looking for dairy-free or gluten-free snack options, perfect for packing lunches or quick nibbles after school.
Granola can get pricey when you buy it pre-made, so I decided to roll up my sleeves and make my own batch. Spoiler alert: it turned out even better than the store versions. The best part? You get to control the sugar, which is often hiding way too much in store-bought granola without you realizing it.
The beauty of this recipe is that it’s totally adjustable to your taste. Want to throw in more nuts? Go for it! Prefer a different nut or some extra seeds? Do it! If dried fruit is your thing, toss some in and make it yours.
For me, I load up on seeds and skip the dried fruit because it tends to soften the granola. I like mine crunchy, especially since I often eat it with fresh fruit or sprinkled on an açaí bowl.
By the way, if you haven’t yet tried granola on an açaí or smoothie bowl, you’re seriously missing out! It adds this perfect mix of crunch and chew that’s just delightful.
When it’s cooking, the whole house fills with the warm scent of cinnamon, and honestly, it feels like a little cozy hug from the kitchen. My kids adore it too, and I love knowing they’re munching on something wholesome. Alright, let’s dive into how to whip up this healthy granola recipe.
Benefits of Making Homemade Healthy Granola
- You get to control exactly how much sugar you add, so no hidden highs.
- You can customize everything to match your family’s favorite flavors.
- It’s way more budget-friendly—a big bag of oats costs just a few bucks.
- When stored right, it keeps fresh and crunchy for a long time.
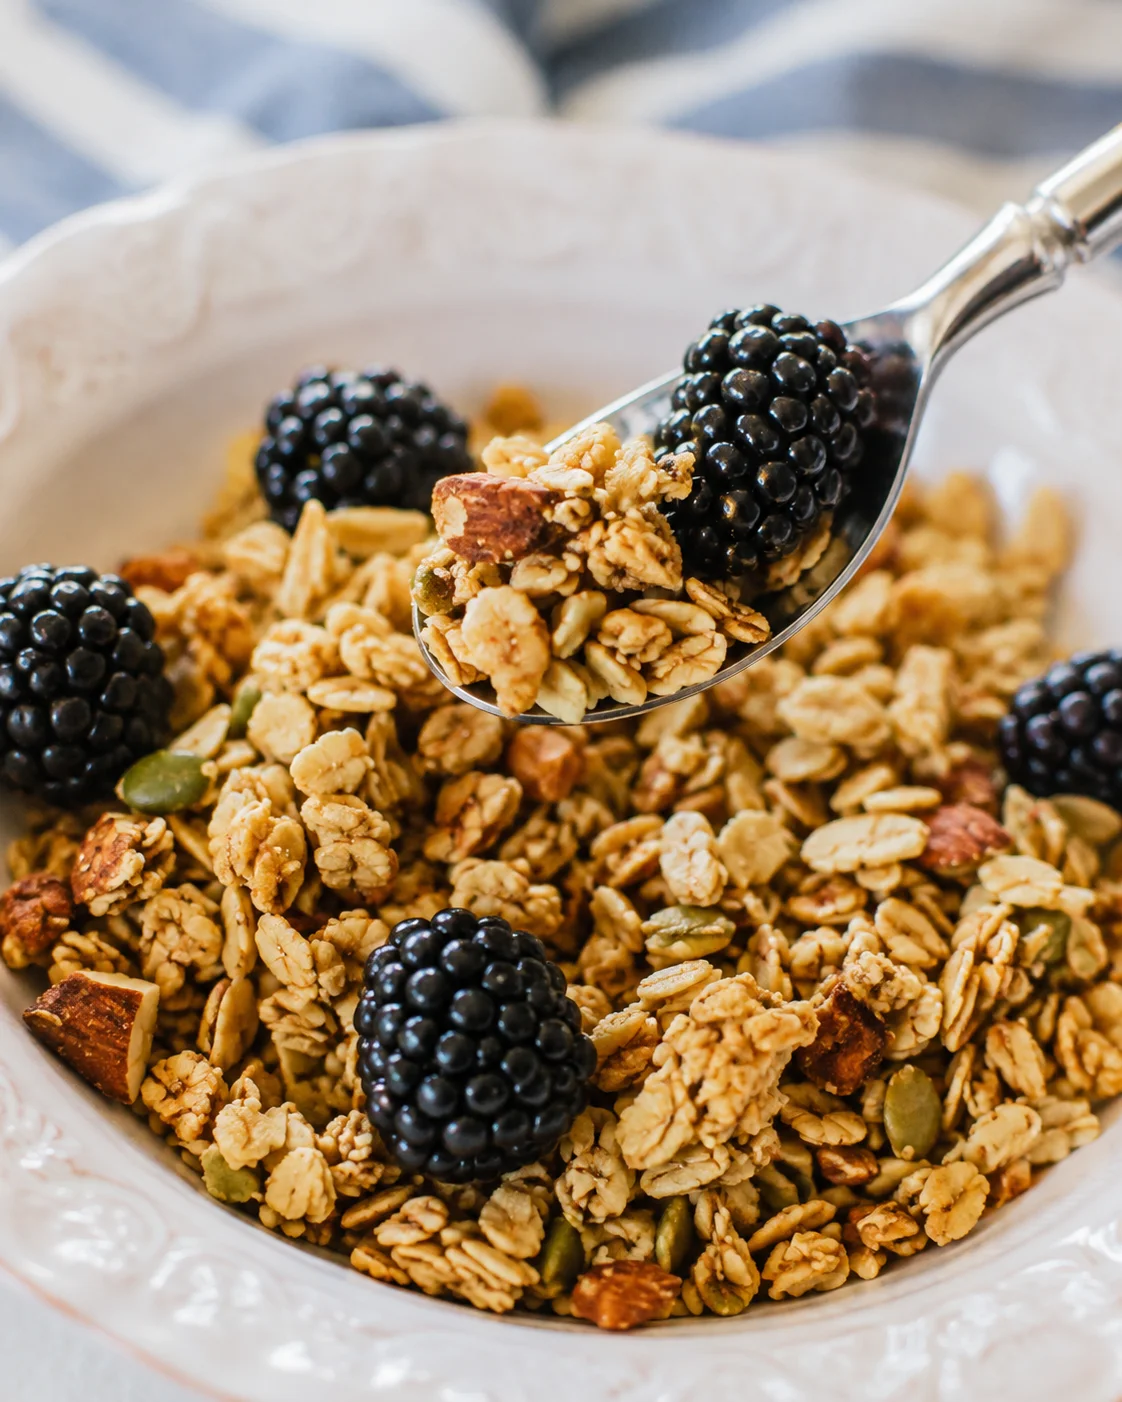
I actually made a second batch swapping in almonds for pecans because my husband Rob is allergic to pecans. Otherwise, I’m all about those pecans! Now, everyone’s happy, and that’s what counts.
This healthy granola recipe comes together in a flash. Just toss your simple ingredients into a bowl, mix it all up, spread it on a baking sheet lined with parchment paper, and pop it in the oven.
Baking is quick, too, but the waiting part definitely is the cooling. You technically can eat it warm off the pan, but I promise waiting for it to cool makes all the difference—it helps those yummy clusters form.
After it cools, just break the big chunks apart with your hands, then stash it in an airtight container. I use these suctioned containers or mason jars, but really any container works.
This homemade granola is healthier than most grocery store options, and totally adaptable to your preferences!
4 Simple Ways to Enjoy Homemade Granola
- Pour it over milk with fresh berries for a quick cereal-style breakfast.
- Layer it with Greek yogurt, berries, and a drizzle of honey to make an easy parfait.
- Sprinkle it on an açaí or smoothie bowl for extra crunch.
- Grab a handful as a wholesome snack anytime you need a bite.
Here’s the recipe below, and remember—it’s super flexible. Swap or skip nuts and seeds based on what you have or like best. My mom, for instance, isn’t a coconut fan (even though I barely notice it here!). If you need a nut-free version, just replace nuts with extra seeds. When I say this healthy granola recipe is versatile, I mean it!
If you’re new to making granola at home (or just tired of buying expensive, sugary store-bought kinds), you’re in for a treat. This healthy granola recipe has become a kitchen staple for us. It’s quick, simple, and you can adapt it any way you want. While baking, your kitchen will fill with that irresistible cinnamon and toasty oat aroma. The end result? Crunchy, flavorful granola perfect for milk, yogurt, or smoothie bowls.
You can expect a straightforward process that takes about 40 minutes from start to finish. This recipe yields roughly 12 servings, enough to keep the family stocked for breakfasts or snacks. Since you’re in control, you can easily adjust sweetness or swap ingredients to make it gluten-free, dairy-free, lower sugar, or nut-free as needed.
Below, I break down all the ingredients with swaps, step-by-step instructions, and tips for storage so your granola stays crispy. I also include tricks for getting those big crunchy clusters we all love, plus mix-in ideas and answers to your common questions. By the end, you’ll feel confident making this healthy granola recipe your own.
Ready to get started? Scroll down to the ingredients and let’s make some magic!
Why You’ll Love It
This homemade granola is quick, flexible, and always delicious—perfect for breakfasts, yogurt parfaits, smoothie bowls, spooned over vanilla chia pudding, or just a quick grab-n-go snack. Making it yourself means you decide how sweet it is and exactly what goes in. It can be gluten-free, dairy-free, lower in sugar, or nut-free, depending on what your family needs. Prefer a classic, tried-and-true version? Try The Very Best Granola.
- Control the sugar and fat—add as much or as little maple syrup and coconut oil as you like.
- Switch nuts, seeds, or sweeteners to fit allergies or what’s in your pantry.
- Save money—big bags of oats and bulk nuts are way cheaper than pre-packaged granola.
- Keep it fresh and crunchy longer with proper storage, making batch cooking a breeze.
What You’ll Need
- 4 cups certified gluten-free rolled oats or classic old-fashioned oats
- 1 cup nuts— pecans or raw almonds are delicious choices
- 1/2 cup raw pumpkin seeds (pepitas)
- 1 Tbsp chia seeds
- 1/4 cup hemp seeds
- 1/4 cup unsweetened coconut flakes
- 1/2 teaspoon ground cinnamon
- 1/2 cup melted coconut oil
- 1 teaspoon salt
- 1/2 cup pure maple syrup
- 1 teaspoon vanilla extract
How to Make the Granola
- Preheat the oven to 350°F (175°C).
- In a medium bowl, combine the dry ingredients: rolled oats, nuts, pumpkin seeds, chia, hemp seeds, coconut flakes, and ground cinnamon.
- In a small bowl, whisk together the wet ingredients and salt: melted coconut oil, maple syrup, vanilla extract, and salt until the salt dissolves.
- Pour the wet mixture over the dry ingredients and stir well to coat everything evenly.
- Line a rimmed baking sheet with parchment paper or a silicone mat and spread the granola into a single, even layer; press down gently with a spatula to pack.
- Bake the granola for 12 minutes.
- Remove the pan, stir the granola, press it down again, and rotate the pan for even browning.
-
Return the pan to the oven and bake an additional 10–12 minutes until the granola is golden and fragrant, watching closely to avoid burning.
- Remove the pan from the oven and let the granola cool completely on the baking sheet without stirring (about 45 minutes) to allow clusters to form.
- Break the cooled granola into chunks with your hands.
- Optional: fold one lightly beaten egg white into the wet mixture before combining (ensure the coconut oil isn’t hot) to help form larger clusters.
- Optional: add delicate mix-ins like chocolate chips, toasted coconut, or dried fruit only after the granola has fully cooled.
Expert Tips for Perfect Clusters
- Mix the salt into your wet ingredients first — this helps it dissolve and spreads the flavor evenly so no salty bites surprise you.
- Press the granola firmly into an even layer on the baking sheet before baking, then after stirring during baking, press again. It helps create those sought-after clusters.
- Let the granola cool completely on the baking sheet—this step solidifies the crunch and cluster formation.
- Keep an eye on it toward the end of baking time — granola can go from golden to burnt fast. Since it crisps more as it cools, it’s better to pull it out a little early rather than overbaking.
- If you want to boost cluster size, gently fold in one lightly beaten egg white with the wet mix. Make sure the coconut oil isn’t hot so the egg white won’t cook. Use this trick only if you’re comfortable working with raw egg white in baking.
- Add delicate mix-ins like chocolate chips or dried fruit only after baking so they don’t melt or get soggy.
- Use parchment paper or a silicone mat to spread out the granola for easy cleanup and even browning. Rotating your pan mid-bake helps if your oven has hot spots.
Flavor Swaps and Add-Ins
Simple swaps and extras can switch up your granola’s flavor and nutrition without changing the core method.
- Nuts: pecans, almonds, walnuts, or cashews can be swapped one-to-one.
- Seeds: pumpkin (pepitas), sunflower, flax, sesame, or extra hemp and chia seeds to up the omega-3 content.
- Nut-free: skip all nuts and double seeds plus oats for great texture and nutrition.
- Sweeteners: try honey, agave, or brown rice syrup instead of maple syrup (texture and taste will vary a bit).
- Flavor boosts: cinnamon, cardamom, or just a pinch of nutmeg are lovely. You can also add vanilla or almond extract to the wet mix. Those cozy spices shine in Pumpkin Chia Pudding, too.
- Mix-ins after baking: toasted coconut flakes, cacao nibs, dark chocolate chips, or dried fruit (remember dried fruit will soften granola over time). For an ultra-chocolatey breakfast idea, see Chocolate Chia Pudding.
- Protein punch: stir in a few tablespoons of protein powder with the dry mix or double up on seeds and chopped nuts.
Storage and Shelf Life
Store your cooled granola in an airtight container at room temperature to keep it crisp. A glass mason jar or a sealed container works beautifully—and makes it easy to grab a sprinkle for creamy strawberry chia pudding with Greek yogurt.
- Room temperature: best enjoyed within 2–3 weeks for top crunch and freshness.
- Refrigerator: store up to 2–3 months, though the crunch might fade slightly unless sealed well.
- Freezer: keeps for up to 6 months in a well-sealed container or freezer bag. Just thaw at room temp when ready.
If your granola ever softens, pop it on a baking sheet and warm at 300°F (150°C) for 5–10 minutes, watching closely, or microwave in short bursts till crisp again. Remember, dried fruit will gradually soften granola as it releases moisture, so plan accordingly.
Common Questions Answered
- Can I make this gluten-free? Yes! Just be sure to use certified gluten-free rolled oats to keep the recipe safe for gluten sensitivities.
- Is it possible to make it nut-free? Absolutely. Swap all nuts for extra seeds like pumpkin, sunflower, flax, or sesame, or add more oats for texture.
- What oil can replace coconut oil? Melted coconut oil adds great flavor but you can substitute neutral oils like light olive or avocado oil. Just know this can change the flavor and affect cluster formation slightly.
- Can I use honey instead of maple syrup? You sure can! Honey sweetens and binds the granola similarly, though it might change the flavor and stickiness a bit.
- How do I get big clusters in my granola? Press firmly into the pan before baking and after stirring mid-bake, then let it cool completely. You can also fold in one beaten egg white with the wet ingredients for extra clumping power.
- Why is my granola soft? Usually, it hasn’t cooled fully, has absorbed moisture from fresh or dried fruit, or was under-baked. You can re-crisp it in the oven if needed.
- How do I know when it’s done baking? It should be a lovely golden brown and smell fragrant. Since ovens vary, start checking a bit early and watch for even color.
- Can I add chocolate or dried fruit before baking? Avoid adding chocolate before baking as it will melt. Dried fruit can be baked but will soften the granola over time; for maximum crunch add dried fruit after baking. For a parfait-style breakfast, spoon cooled granola over creamy banana chia pudding with Greek yogurt.
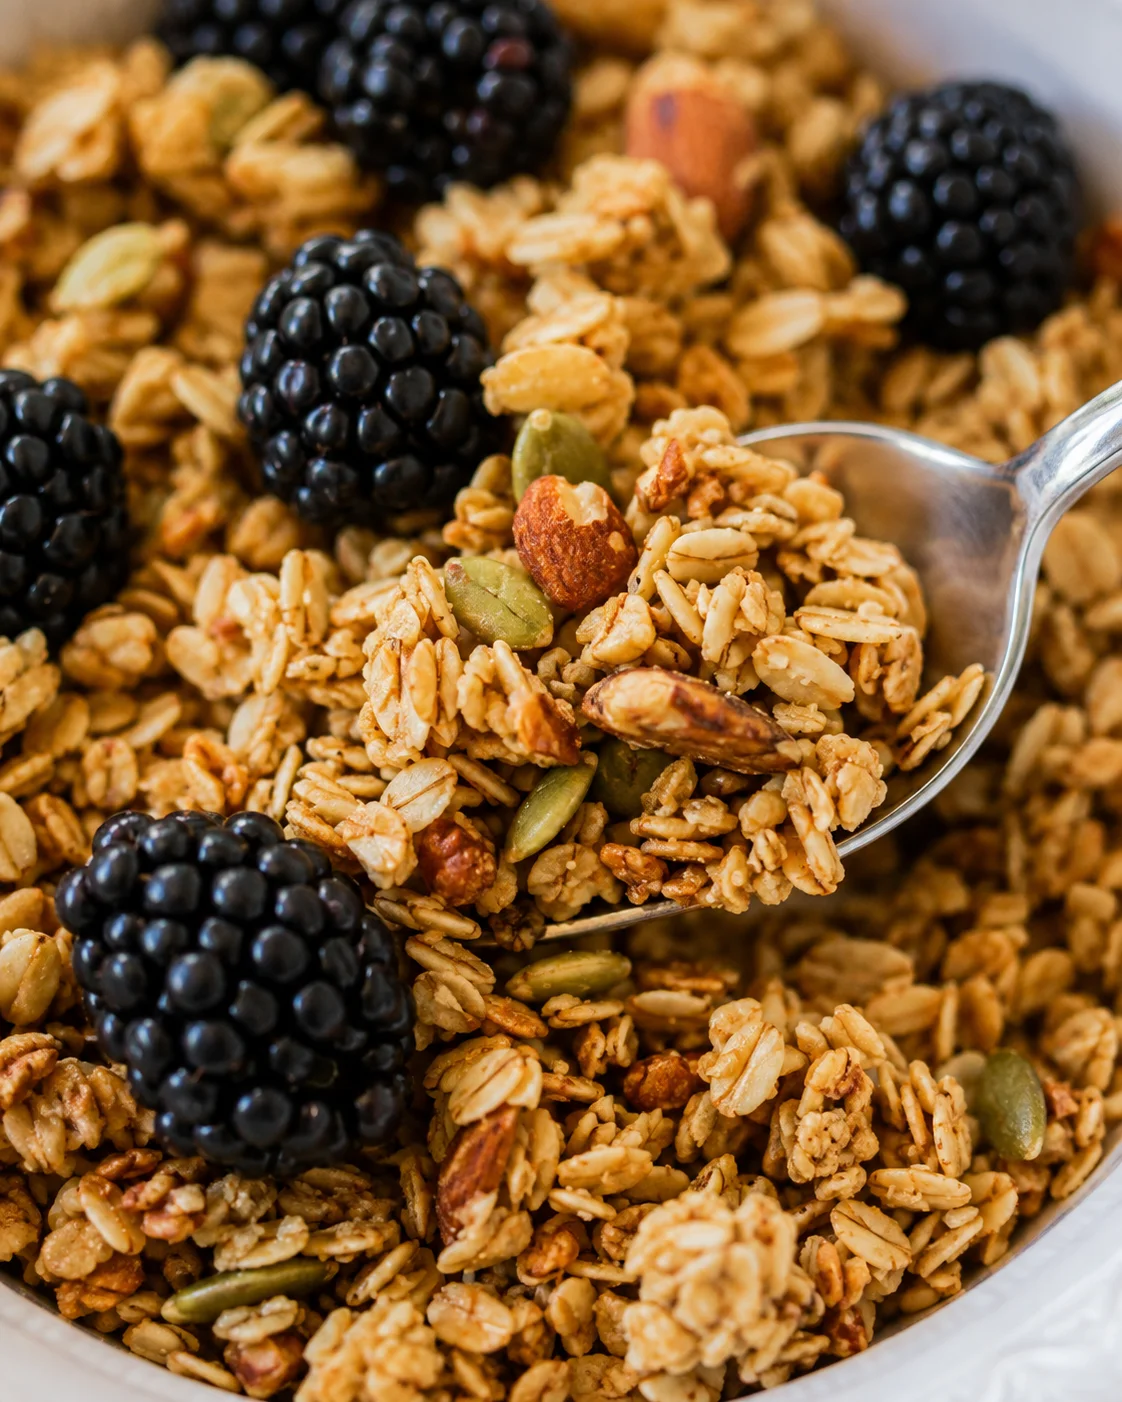
A simple, customizable, and wholesome granola recipe that is gluten-free, dairy-free, and adaptable for nut-free diets. Perfect for breakfasts, snacks, yogurt parfaits, and smoothie bowls.
- Prep Time: 10 minutes
- Cook Time: 22-24 minutes
- Total Time: 45-50 minutes plus cooling
- Yield: Approximately 12 servings 1x
- Category: Snack
Ingredients
- 4 cups certified gluten-free rolled oats or classic old-fashioned oats
- 1 cup nuts (pecans or raw almonds)
- 1/2 cup raw pumpkin seeds (pepitas)
- 1 tablespoon chia seeds
- 1/4 cup hemp seeds
- 1/4 cup unsweetened coconut flakes
- 1/2 teaspoon ground cinnamon
- 1/2 cup melted coconut oil
- 1 teaspoon salt
- 1/2 cup pure maple syrup
- 1 teaspoon vanilla extract
Instructions
- Preheat the oven to 350°F (175°C).
- In a medium bowl, combine the rolled oats, nuts, pumpkin seeds, chia seeds, hemp seeds, coconut flakes, and ground cinnamon.
- In a small bowl, whisk together the melted coconut oil, maple syrup, vanilla extract, and salt until the salt dissolves.
- Pour the wet mixture over the dry ingredients and stir well to coat evenly.
- Line a rimmed baking sheet with parchment paper or a silicone mat. Spread the granola mixture into a single, even layer and press down gently with a spatula to pack.
- Bake the granola for 12 minutes.
- Remove the pan, stir the granola, press it down again, and rotate the pan for even browning.
- Return the pan to the oven and bake an additional 10–12 minutes until golden and fragrant, watching closely to avoid burning.
- Remove the pan from the oven and let the granola cool completely on the baking sheet without stirring for about 45 minutes to allow clusters to form.
- Break the cooled granola into chunks with your hands.
- (Optional) To form larger clusters, fold one lightly beaten egg white into the wet mixture before combining (ensure the coconut oil isn’t hot).
- (Optional) Add delicate mix-ins like chocolate chips, toasted coconut, or dried fruit only after the granola has fully cooled.
Notes
To get big clusters, press firmly into the pan before and after baking and allow the granola to cool completely., Store cooled granola in airtight containers at room temperature for 2–3 weeks, in the refrigerator up to 2–3 months, or in the freezer up to 6 months., Re-crisp softened granola by warming at 300°F (150°C) for 5–10 minutes or microwaving in short bursts., Customize by swapping nuts and seeds; for nut-free, double seeds and oats., Sweeteners such as honey, agave, or brown rice syrup can substitute maple syrup with slight changes to taste and texture., Add mix-ins like dried fruit or chocolate chips after baking to avoid sogginess or melting.
Nutrition
- Serving Size: About 1/2 cup (30g) per serving
- Calories: Approximately 180 calories per 1/2 cup serving (varies by ingredient substitutions)
- Fat: 9-11 g per serving
- Carbohydrates: 22-25 g per serving
- Protein: 4-5 g per serving
More in Recipes
Snickerdoodle Pumpkin Bread
Pumpkin Chocolate Chip Bread
Pumpkin Bread Recipe (So Easy!)